Main Courses
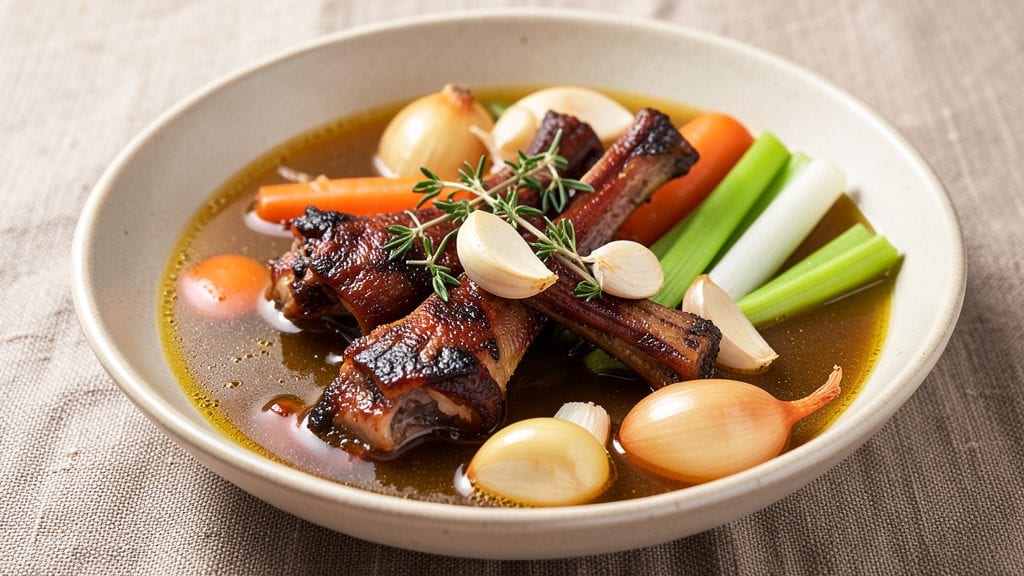
Creating a duck stock recipe transforms ordinary dishes into something extraordinary—rich, velvety, and packed with deep umami flavor that elevates everything from roasts to risottos. 🌟 My first experience making duck stock came in Nana Mae’s kitchen, where she’d simmer bones for hours to create a base so flavorful it made even simple meals taste like a celebration.
The secret lies in roasting the bones first to deepen their flavor, then simmering them with aromatics until the liquid becomes a golden, aromatic elixir. This isn’t just any stock—it’s a foundation that turns braises into masterpieces and sauces into something restaurant-worthy.
With just a few simple ingredients and patience, you’ll end up with a liquid so rich it’ll make your taste buds sing.
What makes this stock special is its versatility—use it for duck confit, risottos, or even soups, and every bite will carry that unmistakable depth. The process is straightforward, but the results are anything but ordinary. Let’s get started on creating this flavor-packed essential for your kitchen.
Once you’ve mastered the basics, you can experiment with additions like white wine or fresh herbs to tailor it to your favorite dishes. The key is letting it simmer low and slow, allowing all those flavors to meld together perfectly.
Trust me, once you taste the difference, you’ll never go back to store-bought again.
Ingredients for duck stock
Roasted bones, aromatic vegetables, and slow simmering create this velvety duck stock that transforms everyday cooking into something extraordinary.
| Ingredient | Amount | Notes |
|---|---|---|
| Duck Bones 🦆 | 3 lb | From whole duck, roasted first |
| Yellow Onion 🧅 | 1 whole | Peeled, halved, charred |
| Carrots 🥕 | 2 lb | Whole, scrubbed, cut into chunks |
| Celery Stalks 🌿 | 4 whole | Trimmed, cut into 2-inch pieces |
| Garlic Cloves 🧄 | 6 cloves | Peeled, smashed |
| Fresh Thyme Sprigs 🌿 | 4 whole | Stems intact for easy removal |
| Fresh Parsley Sprigs 🌿 | 2 whole | Stems intact for easy removal |
| Bay Leaves 🍃 | 2 whole | Dried, standard size |
| Black Peppercorns 🌶️ | 1 tbsp | Crushed, freshly ground |
| Salt 🧂 | 1 tsp | Kosher or sea salt |
| Cold Water 💧 | 12 cups | Filtered preferred |
| White Wine 🍷 | ½ cup | Dry, optional for depth |
| Dried Porcini Mushrooms 🍄 | ¼ oz | Crumbled, for umami |
The duck bones are the heart of this stock—roast them first until deeply browned to unlock their rich, caramelized flavors. Look for whole duck carcasses at specialty butchers or ask your local grocer for the bones after roasting a duck. Costco often sells whole ducks at a great price, and the bones are perfect for stock. If you can't find fresh bones, frozen duck bones work too, just thaw them before roasting. The more bones you use, the deeper the flavor, but even 2 pounds will give you a robust base. For extra richness, add a splash of white wine during simmering—it brightens the stock without overpowering it.
No fresh herbs? Dried thyme and parsley at half the amount work in a pinch, but fresh is ideal for that vibrant aroma. Running short on carrots? Substitute with parsnips or turnips—they add a slightly earthier note. The porcini mushrooms are non-negotiable for umami depth, but if you can't find them, dried shiitake mushrooms are a great alternative. For the onions, char them in a dry pan until blackened—this step is worth the extra minute. The bay leaves should be removed before serving, but don’t skip them—they infuse the stock with subtle, complex flavors. If you're feeling adventurous, add a splash of soy sauce for an extra umami kick, but keep it to just 1 tablespoon.
This stock keeps for up to 5 days in the fridge or 6 months in the freezer—it only gets better with time as the flavors meld. Portion it into ice cube trays for easy use in recipes, or freeze in 1-cup increments for flexibility. The longer it simmers, the deeper the flavor, but never let it boil—keep it at a gentle simmer to avoid cloudiness. Once cooled, skim off any fat that rises to the top, or save it for cooking. Trust me, a few cups of this stock will elevate your roasts, risottos, and braises to restaurant-quality in no time.
Why You'll Love This Recipe
- Pantry Magic: I swear by this stock—no fancy shopping list, just whatever’s lingering in my freezer or crisper. That leftover onion from last night’s stir-fry? Perfect. A couple of carrots I forgot to eat? Even better. It’s the kind of recipe that turns scraps into something golden—no waste, no stress.
- Rich Without Effort: The duck bones alone make this stock taste like a Michelin-starred secret. But here’s the kicker: the garlic and celery? They’re not just flavor—they’re layers. Simmered slow, they melt into the broth until it’s got this deep, almost umami punch that makes even plain rice taste like a celebration.
- Weeknight Superhero: I use this stock for everything—soup on a Tuesday, braised chicken on Thursday, even a quick pasta sauce when I’m too tired to think. Freeze it in ice cube trays, and suddenly, you’ve got restaurant-quality flavor at your fingertips. Honestly, it’s my lazy-day lifesaver.
- Budget Luxury: Duck bones might sound fancy, but they’re cheaper than chicken stock when you think long-term. A single batch stretches into meals for days, and the cost per serving? A fraction of what you’d pay for store-bought. Plus, it’s the kind of thing you can make in bulk and never regret—ever.
Step-by-step instructions for duck stock recipe
Transform simple duck bones into a velvety, umami-rich stock that elevates every dish it touches.
🔥 Step 1: Roast the Duck Bones for Deep Flavor
Preheat your oven to 450°F and place the 3 lb duck bones on a rimmed baking sheet. Roast for 20-25 minutes, turning occasionally, until they develop a deep mahogany color and begin to crisp slightly. This step caramelizes the proteins and fat, creating a rich foundation for your stock.
Here's the thing—don't skip this roasting step. The Maillard reaction happening here builds complex flavors that cold water alone can't extract. You'll know it's ready when the bones smell intensely nutty and the fat starts to render visibly. Transfer the roasted bones to a large stockpot as soon as they're done.
🥘 Step 2: Sauté Aromatics Until Fragrant
In the same stockpot (no need to clean it—the browned bits are flavor gold), add the 1 whole yellow onion (halved), 2 lb carrots (cut into chunks), and 4 whole celery stalks (cut into 2-inch pieces). Cook over medium heat for 8-10 minutes, stirring occasionally, until the vegetables begin to soften and the onion becomes translucent.
This is where the stock gets its signature depth. The vegetables should release their juices and create a light paste at the bottom of the pot. Add the 6 cloves garlic cloves (peeled and smashed) and cook for another 1 minute until fragrant—just enough to wake up the aromatics without burning them.
🍳 Step 3: Add Herbs, Spices, and Liquids
Stir in the 4 whole fresh thyme sprigs, 2 whole fresh parsley sprigs, 2 whole bay leaves, 1 tbsp black peppercorns (crushed), and 1 tsp salt. Pour in the 12 cups cold water and 0.5 cup white wine, scraping up any browned bits from the bottom with a wooden spoon. This deglazing captures all those concentrated flavors.
Bring the mixture to a gentle boil over high heat, then immediately reduce to a simmer. Here's the critical part: you want just a bare bubble breaking the surface every few seconds—not a rolling boil that would make the stock cloudy. Add the 0.25 oz dried porcini mushrooms (crumbled) now—they'll release their earthy umami into the liquid.
⏰ Step 4: Simmer for Maximum Extraction
Cover the stockpot and let it simmer gently for 3-4 hours. The longer it simmers, the more collagen will break down from the bones, creating that signature silky texture. I know it seems like forever, but trust the process—this is where the magic happens.
Check occasionally and add hot water if the liquid level drops below 2 inches from the top. You want enough liquid to keep everything submerged. After 3 hours, remove the pot from heat and let it sit for 15 minutes before straining. This resting period allows any settled particles to sink to the bottom, giving you a clearer stock.
🔪 Step 5: Strain and Store for Future Use
Line a fine-mesh strainer with cheesecloth or a coffee filter for extra clarity, then carefully strain the stock into a large bowl or clean containers. Press on the solids to extract every last drop of flavor—this is pure liquid gold. Discard the solids in the strainer.
Let the stock cool to room temperature, then refrigerate. Once chilled, skim off any solidified fat that rises to the top. Store in airtight containers in the refrigerator for up to 5 days, or freeze for up to 3 months. This stock will transform your risottos, braises, and roasts into restaurant-quality masterpieces.
Pro Tips For Making Duck Stock
- Char the Bones First: I learned this the hard way—skipping the char step means your stock will taste bland. Get those duck bones smoking over direct heat (or a gas burner) until they’re deep brown in spots. The caramelized crust unlocks so much richer flavor than simmering raw bones.
- Cut Celery and Carrots Large: No need to dice them into tiny cubes—chunky 1-inch pieces work better. They’ll soften quickly but still release their sweetness without turning to mush, and you’ll spend half the time chopping. (Yes, even if you’re impatient like me.)
- Simmer Low and Slow: Duck fat rises fast, and if you let it boil, you’ll scorch the stock before it’s done. Keep the heat at a bare simmer—just enough to see tiny bubbles breaking the surface—and resist the urge to crank it up. Four hours is the magic number for deep flavor.
- Save the Duck Fat: That golden layer of fat on top? Don’t pour it down the drain. Strain it into a jar and refrigerate—it’s pure liquid gold for roasting potatoes, searing meats, or finishing dishes. (Your future self will thank you.)
Troubleshooting this recipe
Cloudy Stock Fix
If your stock looks cloudy instead of crystal clear, you’ve likely let it boil too vigorously. The solution? Simmer, don’t boil—keep the temperature just below a rolling boil to prevent proteins from emulsifying and clouding the liquid.
If it’s already cloudy, strain it again through a fine-mesh sieve lined with cheesecloth or use a stock filter like the one from OXO. For extra clarity, chill the stock completely, then carefully pour off the top layer, leaving the settled particles behind. 💧
Weak Flavor Rescue
Did your stock taste bland? Roasting the bones longer (up to 30 minutes) next time will deepen the flavor, or try adding 1 tablespoon soy sauce or ½ cup red wine during simmering for extra umami.
If you’re short on time, simmer uncovered for the last 30 minutes to reduce the liquid slightly—this concentrates the flavors. For immediate results, stir in 1 teaspoon fish sauce (just a splash!) or a pinch of MSG (if you’re not avoiding it) to boost depth. 🌶️
Fat Separation Issues
Excess fat rising to the top? Skim it off while the stock is still warm for cleaner results, or freeze the stock in ice cube trays—the fat will solidify and can be easily removed before using.
If you prefer to keep the fat for cooking, store it in a separate container and use it to sear meats or sauté vegetables later. For a leaner stock, simmer with a bay leaf and a few extra peppercorns—these help clarify the liquid naturally. 🥄
Burnt Aromatics
If your onions or carrots turned too dark and bitter, you pushed them past the sweet spot. Next time, sauté them over medium-low heat until just softened (about 5-7 minutes), not until they’re caramelized.
For a quick fix, remove the burnt bits before adding liquid, or balance the flavor with a splash of apple cider vinegar (just 1 teaspoon) or a pinch of sugar to counteract the bitterness. 🍎
Stock Too Salty
Accidentally over-salted? Don’t panic—dilute the stock by adding 1 cup cold water per quart and simmer for another 10 minutes to even out the flavor. If that’s not enough, use it in recipes where saltiness is expected, like braises or stews, where other ingredients can balance it.
For soups or sauces, reduce the stock slightly to concentrate the flavors before adding more liquid. 🧂
Stock Not Reducing Enough
If your stock is too thin for risottos or sauces, simmer it uncovered for 20-30 minutes to reduce by about 20%. For faster results, transfer it to a saucepan and reduce over medium-high heat, stirring occasionally.
If you’re in a hurry, blend in 1 tablespoon cornstarch mixed with 2 tablespoons cold water per quart, then simmer for 5 minutes to thicken. Just be careful not to over-reduce—duck stock should remain velvety, not gluey. 🍲
Nutrition facts
Frequently asked questions
Why should I roast the duck bones before making stock?
Roasting the bones first unlocks deeper, caramelized flavors through the Maillard reaction—this step creates a rich, nutty foundation that cold water alone can't extract. The bones should be deeply browned and smell intensely aromatic before adding liquid. Skipping this transforms good stock into basic broth.
Can I use frozen duck bones instead of fresh?
Thaw frozen bones completely before roasting to ensure even cooking. The texture difference is negligible once simmered. Just pat them dry first to help them crisp better in the oven. Store-bought frozen bones work perfectly—just check for any added preservatives or seasonings.
How do I know when the stock is done simmering?
Your stock is ready when it smells incredibly rich and the bones are falling apart easily. Aim for 3-4 hours of gentle simmering—longer equals deeper flavor, but never let it boil vigorously. The liquid should reduce slightly but remain abundant enough to cover all ingredients.
What's the best way to store leftover stock?
For short-term use, refrigerate in airtight containers for up to 5 days. For long-term storage, freeze in 1-cup portions (great for recipes!) or in ice cube trays. The fat will solidify on top—just scoop it off before using. Label with the date to track freshness.
Can I substitute chicken stock for duck stock?
While chicken stock works in a pinch, duck stock's rich umami and fat content create a completely different depth of flavor. For dishes like duck confit or risottos, the duck stock's complexity is irreplaceable. Try adding 1 tablespoon soy sauce to chicken stock if you must substitute—it mimics some of the umami.