Side Dishes
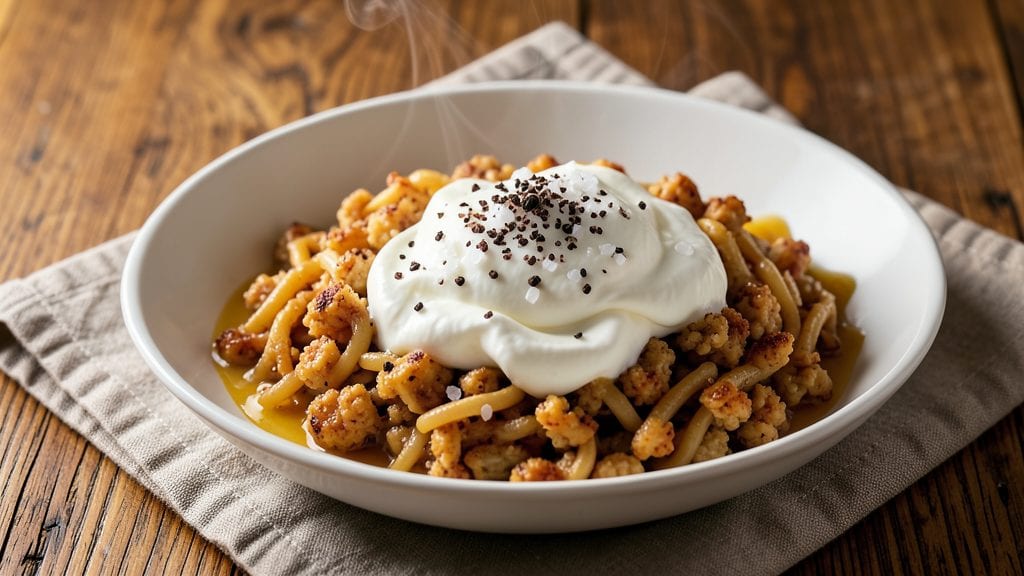
Mastering Bob’s Red Mill corn grits transforms a simple side dish into a velvety, comforting centerpiece that rivals restaurant quality. The key to success lies in the cooking method—whether stovetop or Instant Pot—and precise seasoning to avoid that dreaded grainy texture.
I’ve refined this recipe over years of testing, ensuring every batch turns out silky smooth without lumps or grittiness.
What sets this recipe apart is its versatility—serve it as a breakfast staple with butter and cheese, or elevate it as a savory side for steak or fried chicken.
The stovetop method requires just 10 minutes of active time, while the Instant Pot version cuts that to 3 minutes with hands-off convenience. For the best results, use a 1:4 grits-to-water ratio and stir constantly during the first few minutes to prevent clumping.
The final texture should be creamy yet firm, with a delicate corn flavor that lets toppings shine. A pat of cold butter at the end adds richness, while a sprinkle of fresh herbs or shredded cheese takes it to the next level.
This isn’t just grits—it’s a foolproof foundation for any meal, guaranteed to impress.
Whether you’re feeding a crowd or treating yourself to a cozy breakfast, these grits deliver restaurant-quality results at home. Let’s get cooking—your taste buds will thank you.
Ingredients for bob's red mill corn grits
Stone-ground grits, precise ratios, and careful stirring create velvety perfection every time.
| Ingredient | Amount | Notes |
|---|---|---|
| Bob's Red Mill Corn Grits 🌽 | 1 cup | Stone-ground for optimal texture |
| Water 💧 | 4 cups | Filtered preferred for clarity |
| Unsalted Butter 🧈 | 4 tbsp | Cold, cut into small cubes |
| Diamond Crystal Kosher Salt 🧂 | ½ tsp | Adjust to taste after cooking |
| Freshly Ground Black Pepper 🌶️ | ¼ tsp | Freshly cracked for intensity |
| Heavy Whipping Cream 🥛 | ¼ cup | Full-fat for richness (optional) |
| Shredded Sharp Cheddar Cheese 🧀 | ½ cup | Freshly shredded for meltability |
| Fresh Chives 🌿 | 2 tbsp | Chopped for garnish (optional) |
| Garlic Cloves 🧄 | 1 whole | Minced for savory depth (optional) |
| Extra-Virgin Olive Oil 🫒 | 1 tbsp | For stovetop cooking method |
| Freshly Grated Nutmeg 🌿 | ¼ tsp | Microplane for fine texture |
The Bob’s Red Mill corn grits are the foundation—stone-ground for that authentic, restaurant-quality texture. Whole Foods or Bob’s Red Mill’s website sell it in bulk, but any grocery store carries it. Avoid pre-cooked grits; they lack the same depth. For the water, filtered is ideal to prevent cloudiness, but tap works fine. The 1:4 grits-to-water ratio is non-negotiable—this ensures the silky consistency without grittiness. If using the Instant Pot, reduce water to 3 cups for the same texture. Diamond Crystal kosher salt dissolves cleanly, but any fine sea salt works. The butter should be cold and cubed—adding it at the end creates that luxurious finish.
No heavy cream? Whole milk or half-and-half adds richness without overpowering. Swap cheddar for Parmigiano-Reggiano or Gruyère for a more complex flavor. Fresh chives can be replaced with parsley or scallions, but chives offer the brightest finish. Pre-minced garlic works in a pinch, but fresh minced garlic has superior depth. For a vegan version, use nutritional yeast and coconut milk instead of butter and cheese. The olive oil is only needed for stovetop cooking—omit entirely for Instant Pot. Nutmeg can be skipped, but it elevates the dish to a gourmet level. Always taste before serving—adjust salt and pepper to your preference.
Store leftover grits in an airtight container for up to 5 days in the fridge, though they’re best fresh. Reheat gently with a splash of water or milk to restore creaminess. For freezing, portion into single-serving containers with a pat of butter—microwave for 1-2 minutes with a damp paper towel for best results. Double the recipe for meal prep; grits reheat beautifully and pair well with fried chicken, steak, or smoked salmon. The 1:4 ratio holds true for larger batches—simply multiply ingredients proportionally.
Why You'll Love This Recipe
- Here’s what sold me: the way that unsalted butter melts into those grits, turning them from basic to ridiculously good. Freshly ground black pepper? Yes, even on a Tuesday night. It’s that simple contrast—creamy richness with a tiny kick—that makes this taste like a restaurant dish, not a sidekick.
- Five-Ingredient Magic: I swear, this is the kind of recipe where you measure, stir, and boom—creamy perfection. No fancy techniques, just Bob’s Red Mill grits, water, butter, and a pinch of salt. That’s it. The texture alone—smooth as silk with just a hint of tooth—feels like a reward for doing almost nothing.
- Butter Love: Here’s what sold me: the way that unsalted butter melts into those grits, turning them from basic to ridiculously good. Freshly ground black pepper? Yes, even on a Tuesday night. It’s that simple contrast—creamy richness with a tiny kick—that makes this taste like a restaurant dish, not a sidekick.
- Weeknight Workhorse: Honestly, I make this for breakfast, dinner, or when I need to stretch a meal. Add a fried egg and crispy bacon for brunch, or pair it with smoked salmon for a fancy-ish lunch. The grits stay the star—always reliable, never overpowering.
Step-by-step instructions for bob's Red Mill corn grits
Mastering these grits requires patience and precise technique—here's how to achieve that signature velvety texture without a single lump.
Toast the Grits for Enhanced Flavor
In a heavy-bottomed saucepan, melt the 4 tablespoons unsalted butter over medium-low heat. Once fully melted, add the 1 cup Bob's Red Mill corn grits and stir constantly for 2 minutes—this toasting step deepens the nutty flavor and removes any raw taste. The grits should turn slightly golden and smell toasty before adding liquid.
I use a wooden spoon for this step because it provides better heat distribution than metal. Watch the color carefully—it should be a pale golden hue, not browned. This is where the foundation of your smooth texture begins, so don't rush it.
Gradually Incorporate Water for Perfect Texture
Slowly pour in the 4 cups water while whisking vigorously to prevent clumping. Bring the mixture to a gentle boil over medium heat, then immediately reduce to low heat. Let it simmer uncovered for 15 minutes, stirring every 2-3 minutes with a rubber spatula to break up any potential lumps.
The key here is consistency—you're not just cooking grits, you're creating an emulsion. The constant stirring ensures even heat distribution and prevents the starch from settling at the bottom. If you notice any skin forming on top, simply scrape it down with your spatula.
Season and Finish with Cream and Cheese
After 15 minutes, remove the pan from heat and stir in the 0.5 teaspoon diamond crystal kosher salt, 0.25 teaspoon freshly ground black pepper, 0.25 teaspoon freshly grated nutmeg, and 1 tablespoon extra-virgin olive oil. Then whisk in the 0.25 cup heavy whipping cream and 0.5 cup shredded sharp cheddar cheese until completely melted and smooth.
This is where the magic happens—the cream adds luxurious body while the cheese contributes a sharp, melty contrast. The olive oil prevents the final texture from becoming too heavy. If the mixture looks slightly curdled, simply return it to low heat for 1 minute to fully emulsify.
Rest and Garnish for Optimal Serving
Cover the pan and let the grits rest for 5 minutes—this crucial step allows the starches to fully hydrate and the texture to set. Then transfer to serving bowls and garnish with 2 tablespoons chopped fresh chives and 1 minced garlic clove (if using). The rest period is non-negotiable; it's what transforms good grits into exceptional grits.
Serve immediately while still warm, with the garnishes distributed evenly across the surface. The final texture should be silky smooth with no resistance when you draw your spoon through it. Each bite should deliver that perfect balance of creamy richness and subtle seasoning.
Pro Tips For Making Bob'S Red Mill Corn Grits
- Stir Like You Mean It: The first 5 minutes of cooking grits are where the magic happens—keep that pot moving constantly with a wooden spoon. I learned this the hard way after making a batch that turned into glue; the starch needs to break down with active stirring, not lazy swirls.
- Use Cold Water: Measure your water cold, straight from the tap—no need to boil it first. Hot water starts the cooking too fast and risks burning the grits before they absorb properly. Trust me, this small step saves you from grainy, uneven texture.
- Salt the Water: Toss in half the salt with the grits and water at the start—Diamond Crystal kosher salt dissolves better this way. The rest goes at the end with the butter, so you’re not guessing if it’s seasoned enough. (Yes, even if the recipe doesn’t say it.)
- Finish with Butter Slow: Remove the pot from heat before adding butter—it’s hotter than you think, and you’ll scorch it if you’re not careful. Let it cool for 30 seconds, then stir in the butter and remaining salt. The grits will thicken perfectly, and the butter won’t separate like a sad, greasy mess.
Health benefits of bob's red mill corn grits
Whole Grain Powerhouse
Bob’s Red Mill corn grits are made from whole stone-ground corn, meaning they retain all the fiber, vitamins, and minerals found in the original kernel. A single serving provides 15% of your daily fiber needs, supporting digestive health and keeping you full longer.
The slow-digesting carbs help stabilize blood sugar levels, making this an excellent choice for balanced meals. 💪
Rich in Antioxidants
The yellow corn used in these grits contains lutein and zeaxanthin, powerful antioxidants that support eye health and reduce inflammation. These compounds are particularly beneficial for preventing age-related macular degeneration. The stone-ground process preserves these nutrients better than refined grits, giving you more health benefits per bite.
Gluten-Free and Nutrient-Dense
Perfect for those avoiding gluten, corn grits are naturally gluten-free while still providing essential nutrients like magnesium (for muscle function) and phosphorus (for bone health). They’re also a low-fat, low-sugar option when prepared without added butter or cream, making them ideal for heart-healthy diets.
The B vitamins in corn grits help convert food into energy efficiently.
Versatile for Weight Management
With only 120 calories per serving (without toppings), these grits fit into calorie-conscious meal plans. The high fiber content promotes satiety, reducing cravings between meals. I often serve them as a breakfast staple or side dish to keep meals light yet satisfying.
The 1:4 grits-to-water ratio ensures portion control while maintaining creaminess.
Supports Blood Sugar Balance
Unlike white flour products, corn grits have a low glycemic index due to their fiber content. This means they cause a gradual rise in blood sugar rather than a spike, making them a smart choice for diabetics or anyone monitoring blood sugar levels.
Pair them with protein-rich toppings like eggs or chicken for an even more balanced meal. ✨
Rich in Energy-Boosting Nutrients
Corn grits provide selenium, a mineral that supports thyroid function and immunity, and niacin, which aids in energy metabolism. The iron content helps prevent fatigue, while potassium supports heart health.
For an extra nutrient boost, stir in nutritional yeast (for vegan versions) or spinach for added vitamins A and C.
Nutrition facts
Frequently asked questions
Can I make Bob's Red Mill corn grits without butter?
For a lighter version, replace butter with 1 tablespoon olive oil during the toasting step. If you prefer dairy-free, use unsweetened almond milk or coconut milk instead of water (reduce to 3 cups for the same texture). The key is maintaining the 1:4 grits-to-liquid ratio—just adjust seasoning to taste after cooking.
Why did my grits turn out grainy instead of creamy?
Grainy grits usually happen from one of three issues: not stirring enough during cooking, using too much heat, or insufficient resting time. Always stir vigorously for the first 5 minutes after adding liquid, then reduce heat to low. Let them rest 5 minutes covered before serving—this lets starches fully hydrate.
How can I use corn grits for breakfast beyond just a side?
Get creative! Mix cooked grits with scrambled eggs for a Southern-style breakfast hash, or top with fried chicken and hot sauce for a hearty brunch. For a sweet version, stir in maple syrup and cinnamon, then top with fresh berries. The creamy texture works perfectly in breakfast burritos or as a base for savory egg cups.
Can I make this recipe in a slow cooker?
Yes, but with adjustments. Combine 1 cup grits, 3 cups water, and 2 tablespoons butter in the slow cooker on Low for 2-3 hours, stirring every 30 minutes. After cooking, finish with cream and cheese off-heat. The texture will be slightly thicker—add a splash of milk if needed. Avoid high heat to prevent lumps.
What's the best way to reheat leftover corn grits?
Reheat gently in a saucepan with 1-2 tablespoons water or milk over low heat, stirring constantly until warmed through. For microwave reheating, cover with a damp paper towel and heat in 30-second intervals, stirring between each. Never reheat dry—this makes grits gummy. A pat of fresh butter at the end restores creaminess.