Desserts
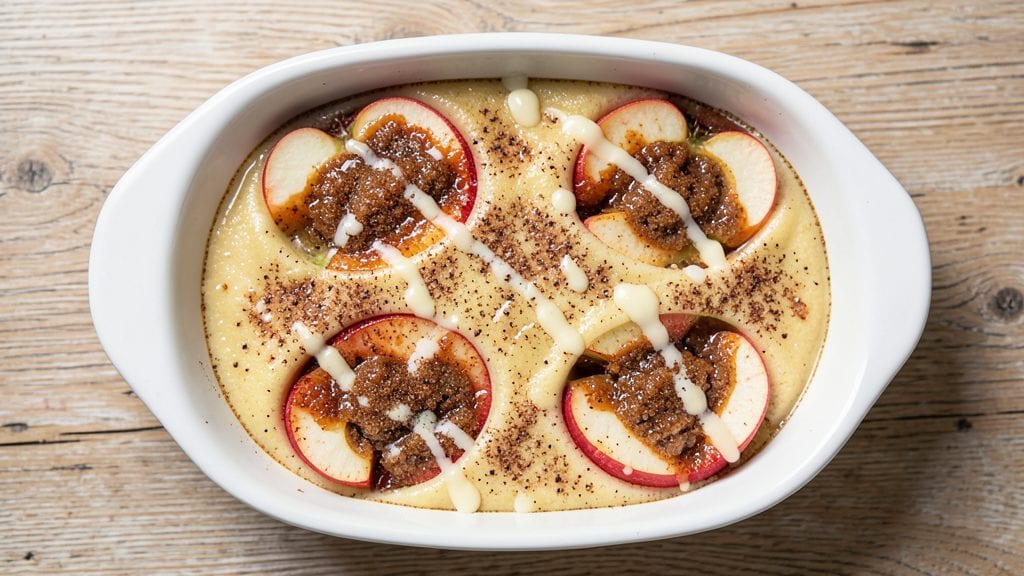
Betty Crocker's baked apples recipe transforms simple apples into a warm, spiced dessert that feels like a hug from your favorite kitchen. The secret lies in the perfect balance of cinnamon, brown sugar, and butter—simple ingredients that create layers of caramelized sweetness and aromatic warmth.
I've perfected this classic recipe over years of testing, ensuring every bite delivers that nostalgic comfort without sacrificing modern convenience.
This recipe delivers restaurant-quality results in just 45 minutes, making it ideal for weeknight desserts or holiday sides. The apples become tender and fragrant, soaking up the spiced filling while developing a natural caramelized crust.
Whether you're serving it as a standalone dessert or pairing it with ice cream, the combination of warm spices and tender fruit creates an irresistible treat.
What makes this recipe special is its versatility—you can use any firm apple variety, and the method works equally well for individual servings or a crowd. The foolproof technique ensures consistent results every time, while optional toppings like chopped nuts or a drizzle of caramel add extra texture and depth.
The aroma alone will have everyone gathering in the kitchen, eager for a taste.
Perfect for fall gatherings, holiday menus, or cozy family dinners, these baked apples bring warmth and homestyle charm to any table. The recipe scales effortlessly, making it ideal for meal prep or last-minute entertaining. Let's get started on creating this timeless dessert that's as comforting as it is delicious.
Ingredients for betty crocker baked apples
Six apples, a handful of pantry staples, and 45 minutes transform into nostalgic cinnamon-spiced comfort.
| Ingredient | Amount | Notes |
|---|---|---|
| Honeycrisp Apples 🍎 | 6 whole | Medium-sized, cores removed |
| Light Brown Sugar 🍚 | ¾ cup | Packed, not compacted |
| Unsalted Butter 🧈 | ½ cup | Cold, cubed for even melting |
| Ground Cinnamon 🌿 | 2 tbsp | Freshly ground preferred |
| Ground Nutmeg 🌶️ | 1 tsp | Freshly grated for depth |
| Allspice 🌶️ | ½ tsp | Whole berries crushed |
| Salt 🧂 | ¼ tsp | Diamond Crystal kosher |
| Vanilla Extract 🍯 | 1 tsp | Pure, high-quality extract |
| Walnuts 🥜 | ½ cup | Chopped, toasted for crunch |
| Heavy Cream 🥛 | ¼ cup | Whipped for optional topping |
| Maple Syrup 🍁 | 2 tbsp | Grade A for drizzling |
The apple selection matters—Honeycrisp or Fuji hold their shape while caramelizing beautifully, but Granny Smith adds tart contrast if you prefer balance. Most grocery stores carry these varieties year-round, but local orchards in fall offer the freshest, most flavorful options. For the spices, Penzeys or bulk bins at Whole Foods provide the highest quality, but even the basic supermarket brands work if they're fresh. The brown sugar should be light, not dark—it dissolves more evenly and enhances the apple's natural sweetness without overpowering it. If you're using pre-packaged sugar, tap the bag gently to settle it before measuring to avoid packing errors.
No Honeycrisp? Braeburn or Pink Lady are excellent substitutes—they're firm enough to hold their shape during baking. Running short on butter? Coconut oil in equal measure works in a pinch, though it lacks the rich flavor. Want extra warmth? Add a pinch of cardamom or cloves alongside the allspice. For the walnuts, pecans or almonds provide similar texture, though the flavor shifts slightly. The heavy cream topping is optional but adds luxurious contrast—if you skip it, a drizzle of maple syrup or caramel sauce elevates the presentation. Store-bought caramels work fine, but homemade has more depth.
Prep the apples ahead of time—they can sit filled in the fridge for up to 24 hours, letting the flavors meld. Bake them just before serving so the filling stays warm and the apples retain their texture. Leftovers keep in the fridge for 3 days, though they're best enjoyed fresh. For meal prep, the filling can be made in advance and spooned into the apples right before baking. The walnuts and cream topping should be added fresh to prevent sogginess. Freeze unbaked apples for up to 1 month—thaw overnight in the fridge before baking, adding 5-10 minutes to the cooking time.
Why You'll Love This Recipe
- Five-Ingredient Magic: I swear by this combo—Honeycrisp apples hold their shape, brown sugar caramelizes just right, and that butter-cinnamon-nutmeg trio? It’s like autumn in a skillet. No fancy techniques, just layering those ingredients and letting the oven do the work.
- No-One-Pan Hassle: Honestly, this recipe only needs a baking dish and a knife. Core those apples, toss them in the filling, and you’re done. My kids even help with the stirring—minimal cleanup, maximum satisfaction.
- Breakfast or Dessert: Between us, I’ve served these warm with yogurt for breakfast and as a side with pork chops for dinner. The nutmeg gives it that cozy spice, so it works first thing or when the sun’s going down.
- Leftovers That Last: The best part? These stay perfect in the fridge for days. Reheat them in the microwave for a quick snack, or pack them in lunches—still tender, still sweet, still crave-worthy. Zero waste, all flavor.
Step-by-step instructions for warm spice-filled cinnamon bites
This method delivers perfectly baked apples with a tender center and caramelized spice crust every time.
Prepare the Apples for Baking
Preheat your oven to 375°F while you prepare the apples. Using a sharp paring knife, carefully core each of the 6 whole Honeycrisp Apples, creating a 1-inch deep well in the center. I like to work over a bowl to catch any juice that leaks out—this prevents mess and ensures we use every bit of flavor. Angle the knife slightly to create a clean opening without tearing the fruit.
After coring, gently peel each apple if desired, though the skin adds nice texture. If keeping the peel, make 4-5 shallow vertical cuts around each apple to help the spice mixture penetrate. Place the prepared apples upright in a 9-inch oven-safe skillet or baking dish, ensuring they stand securely. The apples should be close enough to touch but not crowded—this promotes even baking and caramelization.
Create the Spiced Filling Mixture
In a medium bowl, combine the 0.75 cup Light Brown Sugar, 0.5 cup Unsalted Butter (cold, cubed), 2 tbsp Ground Cinnamon, 1 tsp Ground Nutmeg, 0.5 tsp Allspice, and 0.25 tsp Salt. Using your fingers or a fork, work the butter into the dry ingredients until it forms a coarse, crumbly texture with pea-sized butter pieces remaining. This ensures a flavorful crust without making the filling too wet.
Add the 1 tsp Vanilla Extract and 0.5 cup Walnuts, tossing gently to distribute evenly. The walnuts should be toasted beforehand for 3-4 minutes in a dry skillet over medium heat—this enhances their nutty flavor and prevents them from absorbing too much moisture from the filling. Let the mixture cool slightly before proceeding to prevent premature melting in the oven.
Fill and Bake the Apples
Spoon the spiced filling mixture into each apple cavity, pressing down gently to compact it. The filling should reach just below the rim of each apple, leaving a slight gap at the top. This prevents overflow while allowing the apples to soften properly. Transfer the skillet to the preheated oven and bake for 35-40 minutes until the apples are tender when pierced with a paring knife and the filling is bubbling.
Here's the key: the apples are done when they yield slightly to gentle pressure at the base. If the tops brown too quickly, tent loosely with aluminum foil after 25 minutes to prevent over-browning while allowing the filling to caramelize. The house should smell like warm cinnamon and vanilla—this is your signal that the flavors are melding perfectly.
Finish with Cream and Maple Syrup
Remove the baked apples from the oven and let them cool for 5 minutes. While they're still warm, stir the 0.25 cup Heavy Cream until it begins to thicken slightly, then drizzle it over each apple. Immediately return the skillet to the oven for 2-3 minutes to let the cream warm and create a glossy sheen on the filling.
Finish by drizzling 2 tbsp Maple Syrup over the top of each apple, allowing it to pool in the center. The syrup will caramelize slightly from the residual heat, adding depth of flavor. Serve immediately while the filling is warm and the cream is still slightly thick—this is when the texture is at its peak. The contrast of tender apple, spiced filling, and creamy drizzle makes every bite irresistible.
Pro Tips For Making Betty Crocker Baked Apples
- CORE 20 MINUTES FIRST: Let the apples sit uncovered in the oven for the first 20 minutes—no butter or sugar. This caramelizes the natural sugars in Honeycrisp apples, giving them that deep, golden color before the filling even goes in. I learned this the hard way after serving pale, underwhelming apples to guests who expected better.
- BUTTER IN PATCHES: Don’t melt the butter all at once. Dot small chunks (about ½-inch cubes) around the apples before adding the sugar mix. The uneven melting creates pockets of buttery richness that get absorbed into the fruit instead of pooling at the bottom. Yes, it looks messy, but it works.
- SKIP THE NUTMEG: If you’re not a fan of nutmeg’s sharp bite, swap it for a pinch of cardamom or even a tiny bit of cayenne—just ⅛ teaspoon. Nutmeg can overpower the sweetness, especially with Honeycrisp’s crispness. I used to ignore this and wondered why my baked apples tasted like holiday pie leftovers.
- BROWN THE SUGAR: Lightly toast the brown sugar in a dry skillet for 2–3 minutes until it smells toasty. This deepens its caramel notes and cuts through the apples’ tartness better than raw sugar. Sounds weird, but it works—your filling will taste like it’s been simmering for hours, not minutes.
Dietary considerations for this betty crocker baked apples
Gluten-Free Adaptations
To make this recipe gluten-free, simply replace the walnuts with toasted pecans or almonds—both are naturally gluten-free and add similar texture. I also recommend using certified gluten-free maple syrup (like Champlain Farms) to avoid cross-contamination.
For extra security, check your brown sugar label—some brands process in facilities with gluten. The rest of the ingredients are inherently gluten-free, so no other substitutions are needed. 🌱
Vegan Substitutions
For a vegan version, swap the unsalted butter for coconut oil or vegan butter (like Miyoko's) and use coconut cream instead of heavy cream. I also recommend adding 1 tsp apple cider vinegar to the filling to enhance the caramelization.
The vanilla extract and maple syrup are already plant-based, so no other changes are necessary. The texture remains rich and satisfying with these swaps.
Low-Sugar Options
Reduce the brown sugar to 0.5 cup and add 1 tsp monk fruit sweetener (like Lakanto) to maintain flavor without excess sugar. Alternatively, use 100% pure apple sauce (unsweetened) in place of half the butter for natural sweetness.
The apples' inherent sugars will still shine through, but with fewer refined carbs. Pair with Greek yogurt instead of cream for added protein. 💪
Nut-Free Variations
Skip the walnuts entirely and add 1 tbsp pumpkin seeds or sunflower seeds for crunch, or omit them for a seed-free version. For extra texture, sprinkle gluten-free oats (certified) on top before baking.
The filling remains flavorful without nuts, and the apples stay tender. This works especially well for guests with nut allergies while keeping the dish hearty and satisfying.
Diabetic-Friendly Adjustments
Use Granny Smith apples for their lower natural sugar content and reduce the brown sugar to 0.375 cup. Add 1 tsp cinnamon (which helps regulate blood sugar) and 1 tbsp chia seeds to the filling for fiber.
Serve with a dollop of unsweetened coconut yogurt instead of cream. These changes keep the dish delicious while being more blood-sugar-friendly. Always monitor portion sizes for optimal results.
Nutrition facts
Frequently asked questions
Can I make this recipe with any type of apple?
While this recipe works with most apples, Honeycrisp, Fuji, or Braeburn are ideal—they hold their shape while caramelizing beautifully. For a tart contrast, Granny Smith works too, but avoid overly soft varieties like McIntosh as they'll break down too quickly. The key is firm, crisp apples that can stand up to 35-40 minutes in the oven without turning mushy.
How do I prevent the apples from drying out?
Keep the filling just below the rim of each apple to allow room for expansion. Tent with foil after 25 minutes if browning too quickly, and avoid overcrowding the baking dish. For extra moisture, add 1 tablespoon apple juice to the filling mixture. The apples should be tender but not falling apart when done—pierce with a knife to test.
Can I prepare these ahead of time?
Yes! Fill the apples and refrigerate them (unbaked) for up to 24 hours before baking. For make-ahead convenience, bake them completely, then reheat in the oven at 350°F for 10-15 minutes with a splash of water in the pan to restore moisture. The filling will soften slightly but still taste delicious. Store leftovers in the fridge for 3 days.
What's the best way to serve these baked apples?
They're perfect as a standalone dessert, but for extra flair, serve with a scoop of vanilla ice cream or a dollop of whipped cream. For a brunch twist, pair with Greek yogurt and a drizzle of honey. The warm spiced filling contrasts beautifully with cool toppings, creating a restaurant-worthy presentation. Garnish with extra cinnamon or chopped nuts for visual appeal.
Can I make this recipe in a slow cooker?
Arrange the filled apples in a slow cooker on low for 2-2.5 hours, covered. The gentle heat allows the flavors to meld without browning. Add 2 tablespoons apple cider to the bottom of the slow cooker for extra moisture. The texture will be softer than oven-baked, but the spice flavors will be even more pronounced.