Soups & Stews
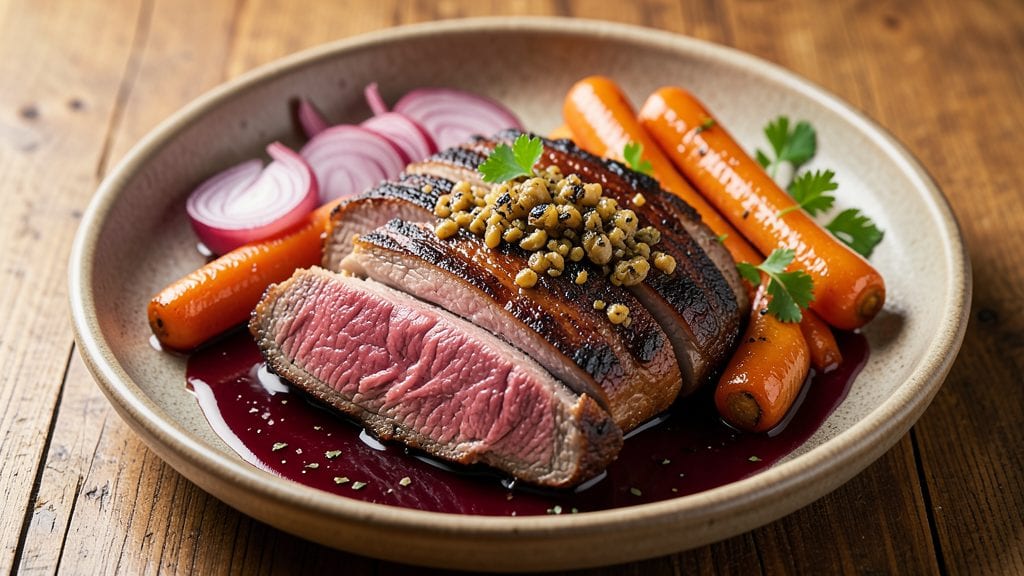
Transforming tough beef chuck shoulder into melt-in-your-mouth stew requires patience and precision—this recipe delivers restaurant-quality depth with just a few key techniques. The slow braising process breaks down connective tissue while building layers of umami through caramelized aromatics and rich broth.
I've perfected this method over years of testing, ensuring every bite delivers that perfect balance of tenderness and savory complexity.
What sets this stew apart is the flavor development—starting with a deep brown sear on the beef creates the Maillard reaction that forms the foundation for all those rich, caramelized notes.
The slow cook time, typically around 3 hours, allows the meat to become fork-tender while absorbing the flavors of onions, garlic, and herbs. This isn't just a stew; it's a deeply satisfying meal that transforms simple ingredients into something extraordinary.
The result is beef that falls apart at the touch of a fork, swimming in a velvety broth infused with herbs and vegetables. The aroma alone will have everyone gathering at the table, and the first bite delivers that perfect harmony of tender meat, caramelized vegetables, and deeply flavorful sauce.
This is comfort food at its finest—a hearty stew that's perfect for cold evenings or family gatherings.
Pair it with crusty bread to soak up every last drop of that rich sauce, or serve alongside roasted potatoes for a complete meal. The beauty of this recipe lies in its versatility—make a big batch for leftovers or adjust the seasoning to suit your preferences.
Let's get started on creating this deeply satisfying stew that will become a staple in your cooking repertoire.
Ingredients for beef chuck shoulder
The secret to melt-in-your-mouth beef chuck shoulder lies in these 15 ingredients—simple but powerful.
| Ingredient | Amount | Notes |
|---|---|---|
| Beef Chuck Shoulder 🥩 | 4 lb | Cut into 1.5-inch chunks, trimmed of fat |
| Yellow Onions 🧅 | 2 whole | Medium size, sliced into half-moons |
| Carrots 🥕 | 4 whole | Medium size, cut into 1-inch chunks |
| Garlic Cloves 🧄 | 6 cloves | Peeled, smashed with side of knife |
| Tomato Paste 🍅 | ½ cup | High-quality, no sugar added |
| Beef Broth 💧 | 4 cups | Homemade or high-quality low-sodium |
| Red Wine 🍷 | 1 cup | Bold dry red like Cabernet Sauvignon |
| Fresh Thyme 🌿 | 2 tbsp | Leaves only, stems removed |
| Fresh Rosemary 🌿 | 1 tbsp | Needles only, finely chopped |
| Bay Leaves 🍃 | 2 whole | Dried, standard size |
| Olive Oil 🫒 | 2 tbsp | Extra-virgin for searing |
| Salt 🧂 | 1 ½ tsp | Kosher or sea salt, coarse |
| Black Peppercorns 🌶️ | 1 tsp | Freshly cracked, not ground |
| All-Purpose Flour 🌾 | 2 tbsp | For thickening sauce |
| Crusty Bread 🍞 | 6 slices | For serving, optional |
The beef is your star—look for well-marbled chuck shoulder at the butcher counter or pre-cut section. Costco or Whole Foods often have the best quality, but your local grocery store's meat department works too. Trim excess fat if you're health-conscious, but leave some for flavor. The onions and carrots should be firm and vibrant—no wilted or shriveled veggies. For the tomato paste, Mutti or Barilla brands are my go-tos—they've got that deep, concentrated flavor. And that red wine? Any bold, dry red works here—Cab Sauv, Merlot, whatever's open.
No red wine? Beef broth with a splash of balsamic gets you close. Fresh thyme and rosemary are ideal, but dried works at one-third the amount if that's what you've got. The tomato paste can be from a squeeze tube—Trader Joe's has great ones that last forever. For the flour, King Arthur or Gold Medal are reliable choices. The beef broth should be rich and flavorful—homemade is best, but store-bought works in a pinch. Just make sure it's low-sodium unless you're adding extra salt later. And if you're using fresh herbs, strip the leaves from the stems—you only need the aromatic parts.
This stew tastes even better the next day—make a big batch and save leftovers for lunches. Keeps 4-5 days in the fridge, or 3 months in the freezer if you portion it properly. I like to store it in glass containers because it reheats so well. For serving, crusty bread is a must—it soaks up all that rich sauce. And if you're feeling fancy, garnish with fresh parsley right before serving. It adds a pop of color and freshness that ties everything together.
Why You'll Love This Recipe
- One-Pot Magic: I swear by this recipe when I’m too tired to scrub a million pots. Just dump everything—chuck shoulder, onions, carrots, garlic—into a deep skillet, let it caramelize, then add tomato paste and liquid. Walk away for an hour, and boom, dinner’s done. (Yes, even on a Tuesday night.)
- Deep, Rich Payoff: That beef chuck shoulder? It’s the star. Slow-cooked until it falls apart, but with a crust that’s almost crispy—like a hug from your grandma’s kitchen. The tomato paste and garlic turn it into something so savory, I’ll eat it straight from the pan. (Not the prettiest, but the taste makes up for it.)
- Leftovers That Save Me: This recipe practically begs to be made in bulk. The flavor gets better the next day, and I freeze portions for lazy Mondays. My freezer is full of these, and honestly? I don’t even mind reheating it because it’s that good.
- Budget Meal, Big Impact: A chuck shoulder is cheap, but it feels like a fancy cut. Onions and carrots stretch the filling factor, and tomato paste adds depth without breaking the bank. I’ll be real: this is my go-to when I need to feed a crowd without stressing over cost. (My daughter picks out the carrots, but still asks for seconds.)
Step-by-step instructions for beef chuck shoulder stew
This slow-braised masterpiece delivers melt-in-your-mouth beef and aromatic vegetables packed with umami richness.
🍳 Step 1: Sear the Beef Chuck Shoulder for Maximum Flavor
Heat a large Dutch oven over medium-high heat until hot. Add the 2 tablespoons olive oil and let it shimmer for 30 seconds. Working in batches, add the 4 lb beef chuck shoulder cut into 1.5-inch chunks, arranging them in a single layer. Let them sear undisturbed for 3-4 minutes until deep golden brown forms on all sides.
This crucial step develops the rich, caramelized crust that forms the flavor foundation. Don't rush it—if the beef releases easily from the pan, it's ready to move. Transfer the seared beef to a plate and set aside. You'll notice the oil will look darker after searing, which is perfect for building depth in your stew.
👨🍳 Step 2: Build the Aromatic Base with Onions, Carrots, and Garlic
In the same Dutch oven, reduce heat to medium and add the sliced 2 whole yellow onions and 4 whole carrots cut into 1-inch chunks. Cook for 5-6 minutes, stirring occasionally, until the onions soften and begin to caramelize at the edges. This process takes time, but the sweet, jammy onions are worth the patience.
Add the 6 cloves garlic smashed with the side of your knife, along with the 2 tablespoons fresh thyme and 1 tablespoon fresh rosemary (needles only). Stir for 30 seconds until fragrant—you'll smell that wonderful herbal aroma that signals the base is ready. The garlic should sizzle gently but not burn, which would make the stew bitter.
🍳 Step 3: Deglaze and Develop the Sauce Foundation
Pour in the 1 cup red wine and scrape up all those beautiful browned bits from the bottom of the pot with a wooden spoon. This deglazing step captures all that concentrated beef flavor that would otherwise stick to the pan. Let the wine simmer for 3-4 minutes until it reduces by half and the alcohol cooks off.
Stir in the 0.5 cup tomato paste and cook for 2 minutes until it darkens slightly and blends smoothly with the wine. This creates a rich, velvety base that will thicken beautifully as the stew simmers. The tomato paste also adds a subtle sweetness that balances the deep umami flavors developing in the beef.
⏰ Step 4: Slow-Braise Until Fork-Tender Perfection
Return the seared beef to the Dutch oven along with the 4 cups beef broth, 1.5 teaspoons salt, 1 teaspoon black peppercorns, and 2 whole bay leaves. Bring to a gentle simmer, then reduce heat to low and cover partially with a lid. This is where the magic happens—braising for 2.5-3 hours until the beef is fork-tender and nearly falls apart.
Check the stew after 2 hours—the beef should be easily pierced with a fork but still have some resistance. If it's not quite there, continue cooking for another 30 minutes. The liquid should reduce until it just coats the beef and vegetables. If it's too thin, uncover the pot and simmer uncovered for 10-15 minutes to thicken slightly. The aroma filling your kitchen will make every minute of waiting worthwhile.
🥘 Step 5: Thicken and Serve with Crusty Bread
Remove the bay leaves and stir in the 2 tablespoons all-purpose flour, mixing well to distribute evenly. Let the stew simmer uncovered for 5-10 minutes until it thickens to your desired consistency. Taste and adjust seasoning—you might need a pinch more salt or a crack of pepper to perfect the balance.
Ladle the rich stew into bowls and serve immediately with the 6 slices crusty bread on the side. Each bite should deliver tender, flavorful beef that practically melts in your mouth, paired with perfectly cooked vegetables in a sauce that's rich but not heavy. The crusty bread is essential for soaking up every last drop of that delicious braising liquid. This stew tastes even better the next day, so make extra if you can—it's perfect for meal prep!
Pro Tips For Making Beef Chuck Shoulder
- SEAR THE MEAT FIRST: Chuck shoulder needs that crust to stay juicy, so don’t skip the initial sear. Get your pan screaming hot—we’re talking smoke testing the air—and let those brown bits form before you even think about adding onions or carrots. I used to rush this, and my chuck would turn out tougher than a boot.
- CHOP ONIONS LARGE: Tiny diced onions disappear too fast and burn before they sweeten the pot. Cut them into ½-inch chunks so they caramelize properly alongside the beef. Yes, they’ll look rustic, but that’s how you get real flavor—not sad, mushy bits.
- DON’T SKIP THE REST: After cooking, let the beef rest at least 15 minutes under foil before slicing. I know, you’re hungry now, but cutting into it too soon means juices running all over your plate instead of staying inside. Trust me, it’s worth the wait.
- USE TOMATO PASTE EARLY: Stir in that tomato paste with the onions and garlic—don’t wait until the end. It deepens the color and flavor by cooking into the base, not just sitting on top like a sad garnish. A tablespoon or two is enough; no need to go heavy.
Common mistakes when making perfect results
Overcooking the Beef
One of the biggest mistakes is letting the beef chuck shoulder cook too long, which turns it from tender to dry and stringy. I've learned the hard way that patience is key—aim for an internal temperature of 195-205°F (not boiling hot).
Use a meat thermometer to check the thickest piece of beef. If you see the liquid reducing too aggressively, add ½ cup beef broth to maintain moisture. 🌡️
Skipping the Sear
Many home cooks rush this step, but searing creates the Maillard reaction that builds deep, caramelized flavor. I always sear my beef in batches to avoid crowding the pan—this ensures a proper crust.
If your pan isn't hot enough, the beef will steam instead of brown. Use medium-high heat and give each piece 3-4 minutes undisturbed. The darker the crust, the richer the flavor.
Using Low-Quality Broth
Store-bought broth can make or break your stew. I recommend homemade broth or high-quality brands like Kitchen Basics or Pacific Foods for maximum flavor. If using low-sodium broth, add extra salt later—1 teaspoon per cup of broth works well.
The broth should be rich and aromatic, not bland or watery. If yours tastes flat, boost it with 1 teaspoon Worcestershire sauce or a splash of red wine during cooking.
Ignoring the Resting Phase
After braising, let the stew rest for 15-20 minutes before serving. This allows juices to redistribute, ensuring each bite is moist and flavorful. I often cover the pot loosely with foil during this time.
Skipping this step means the first few bites might be dry, while the last ones are perfect. The flavors also meld together during resting, creating a more cohesive taste experience. 💫
Overcrowding the Pot
If your stew looks like a soup after cooking, you likely overcrowded the pot. The beef should have room to move—aim for 1 inch of space between pieces when adding liquid. This ensures even cooking and prevents steaming.
If needed, cook in batches or use a larger pot. Overcrowding leads to uneven doneness and a watery texture. The goal is tender beef with just enough sauce to coat it, not drown it.
Neglecting Seasoning Adjustments
Taste your stew before serving and adjust seasoning as needed. I often add ½ teaspoon salt or a crack of black pepper at the end. The flavors deepen as the stew sits, so what tastes perfect fresh might need a boost later.
If the sauce is too thin, mix 1 tablespoon flour with 1 tablespoon cold water and stir in. For acidity, a squeeze of lemon juice brightens the dish. Don’t be afraid to tweak—great stew is all about balance.
Nutrition facts
Frequently asked questions about beef chuck shoulder stew
How long can I store this beef chuck shoulder stew?
The stew tastes even better the next day! Store it in an airtight container in the fridge for up to 5 days. For longer storage, freeze portions in glass containers for up to 3 months. Always cool it completely before refrigerating to maintain quality. Reheat gently on the stove with a splash of broth to restore moisture.
Can I substitute red wine in this recipe?
If you don't have red wine, use 1 cup beef broth plus 1 tablespoon balsamic vinegar for similar depth. For extra richness, add 1 teaspoon soy sauce or Worcestershire sauce. The key is maintaining the same acidity level to tenderize the beef properly. White wine works too, but it won't develop the same caramelized flavors.
What's the best way to reheat leftover stew?
Gently reheat on the stove over low heat with the lid slightly ajar to prevent drying. Add 2-3 tablespoons beef broth if the stew seems thick. Microwave reheating is possible but can make the sauce watery. For best results, warm it in a pot for 5-10 minutes until steaming throughout. The beef should remain tender, not rubbery.
How do I know when the beef is perfectly tender?
Use a meat thermometer to check the thickest piece - it should reach 195-205°F. The beef should also be easily pierced with a fork but still have slight resistance. If it falls apart completely, it's overcooked. For extra assurance, look for a glossy sheen on the meat and a rich, slightly thickened sauce. The aroma should be deeply aromatic with no gamey odors.
Can I make this stew in a slow cooker?
Yes! Brown the beef first in a skillet, then transfer everything to a 6-quart slow cooker. Cook on low for 7-8 hours or high for 4-5 hours. The slow cooker method is perfect for hands-off cooking. Just remember to add a splash of broth if the stew becomes too thick during cooking. The flavors will develop beautifully through the extended cooking time.