Soups & Stews
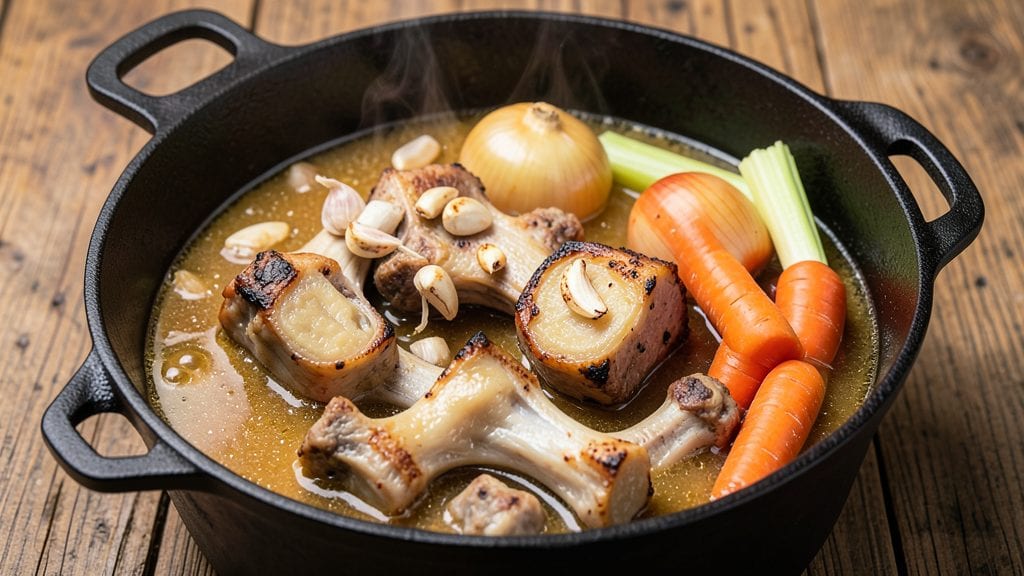
Creating a beef bone marrow stock recipe transforms basic cooking into something extraordinary—this golden, velvety liquid is the secret weapon behind restaurant-quality sauces and braises. The process unlocks deep umami flavor from bones and marrow, delivering a richness you won’t find in store-bought versions.
I’ve perfected this method over years of testing, ensuring every batch develops that signature depth without bitterness.
The key lies in slow extraction—simmering bones and marrow for 3 hours to draw out collagen and natural fats, then clarifying the stock for crystal-clear perfection. This isn’t just stock; it’s a flavor foundation that elevates roasts, gravies, and even soups to new heights.
The result is a silky, intensely savory liquid that reduces beautifully into glossy sauces or enriches braising liquids effortlessly.
With just beef bones, marrow, and aromatics, you’ll create a stock so potent it replaces commercial versions entirely. The process is straightforward but requires patience—no shortcuts here. Store it properly, and you’ll have a pantry staple that lasts for months, ready to transform any dish with umami brilliance.
Optional herbs like thyme or bay leaves add subtle complexity, while a splash of vinegar at the end brightens the flavor. This stock isn’t just functional—it’s a game-changer for serious home cooks. Let’s get started on building your flavor base.
Ingredients for beef bone marrow stock
Golden liquid magic starts with these 11 ingredients—each playing a role in unlocking restaurant-quality umami depth.
| Ingredient | Amount | Notes |
|---|---|---|
| Beef Bones 🦴 | 4 lb | Knuckle or marrow bones preferred |
| Beef Bone Marrow 🧈 | 1 cup | Freshly scooped from bones |
| Yellow Onion 🧅 | 1 whole | Quartered, skin on for color |
| Carrots 🥕 | 2 whole | Scrubbed, cut into chunks |
| Celery Stalks 🌿 | 3 whole | Cut into 2-inch pieces |
| Garlic Cloves 🧄 | 4 cloves | Smashed for deeper flavor |
| Fresh Thyme Sprigs 🌿 | 2 whole | Optional but recommended |
| Bay Leaves 🍃 | 2 whole | Dried or fresh |
| White Wine Vinegar 🍷 | 2 tbsp | Brightens the final flavor |
| Kosher Salt 🧂 | 1 tsp | Diamond Crystal preferred |
| Black Peppercorns 🌶️ | 10 whole | Lightly crushed |
The bones are non-negotiable—look for knuckle or marrow bones at your butcher or grocery store’s meat counter. Local butchers often have the freshest cuts, and they’ll crack open the marrow for you. If you’re using store-bought bones, check the expiration date—older bones yield less flavor. The marrow itself should be creamy and pale yellow, not gray or dry. For aromatics, fresh thyme and bay leaves add complexity, but don’t skip them if you’re using dried—just double the amount. The vinegar might seem odd, but it’s key for balancing the richness at the end.
No marrow bones? Use beef shin bones or oxtails instead, but simmer them 30 minutes longer. Substituting onion powder for fresh onion? Use half the amount—fresh adds sweetness that powder lacks. Running low on thyme? Parsley stems or a pinch of dried marjoram work in a pinch. The vinegar can be swapped for lemon juice or apple cider vinegar**, but white wine vinegar’s acidity cuts through the fat beautifully. For salt, Diamond Crystal kosher dissolves more easily than table salt—trust me on this.
This stock keeps for months in the freezer, but fridge storage is ideal for up to 2 weeks if you’ll use it soon. Skim fat regularly during simmering—it’s where the richness hides, but too much makes the stock greasy. For long-term storage, pour into glass jars or ice cube trays (freeze cubes for single-use portions). The clarified version? Strain through a cheesecloth-lined fine-mesh sieve for silky perfection. Use it in sauces, braises, or even as a base for risotto—just don’t dilute its power.
Why You'll Love This Recipe
- No-Chop Necessary: Honestly, I love that you only need to rough-chop the onion, carrots, and celery—no fancy dice or julienne here. The marrow bones do all the heavy lifting while you sip wine and pretend you’re a French chef.
- Rich Umami Magic: That marrow? It’s the secret weapon—creamy, buttery, and packed with flavor that turns simple broth into something special. The bones add depth, and by the end, you’ll swear you simmered for hours (even if it was just 2).
- Weeknight Superstar: Freeze leftovers in ice cube trays for quick soups, stews, or even a fancy risotto later. I keep a batch in the fridge for emergencies—because nothing beats homemade stock when you’re too tired to think.
- Budget-Friendly Luxury: Use cheaper cuts of beef bones and marrow scraps (ask your butcher!) to make something that tastes like a high-end restaurant. It’s the kind of deal that makes grocery shopping feel like a win.
Step-by-step instructions for beef bone marrow stock
Here's how to transform simple bones and marrow into a velvety, umami-rich stock that elevates any dish.
Prepare the Bones and Mise en Place
Begin by examining the 4 lb beef bones—knuckle or marrow bones work best. Rinse them under cold water to remove any surface debris, then pat completely dry with paper towels. This step is crucial because moisture on the bones can dilute your stock later. While the bones dry, prepare all other ingredients exactly as listed: quarter the 1 whole yellow onion, cut the 2 whole carrots and 3 whole celery stalks into 2-inch chunks, smash the 4 cloves garlic, and lightly crush the 10 whole black peppercorns with the flat side of a chef's knife.
Place the 1 cup beef bone marrow in a small bowl and refrigerate until you're ready to add it to the pot. This keeps it firm and easy to scoop later. Gather the 2 whole fresh thyme sprigs, 2 whole bay leaves, and 2 tbsp white wine vinegar—these will infuse the stock with layers of aromatic complexity. I always recommend using fresh thyme when possible, as it adds a brightness that dried herbs can't match.
Roast the Bones for Deep Flavor
Preheat your oven to 425°F and place the prepared bones on a rimmed baking sheet. Roast for 30 minutes, turning occasionally, until they develop a deep golden brown crust. This caramelization is what creates the rich, meaty foundation of your stock. The bones should smell intensely savory by the end—this is your signal that they're ready for the next step.
While the bones roast, prepare a large stockpot. I use a 6-8 quart pot to ensure enough liquid for proper extraction. Once the bones are browned, transfer them to the pot and add 8 cups cold water. The water should cover the bones by about 1 inch—this gives enough liquid to work with while preventing overflow during cooking. Bring to a boil over medium-high heat, then immediately reduce to a gentle simmer. Skim off any foam or impurities that rise to the surface during the first 10 minutes of simmering.
Simmer and Develop the Stock
After skimming, add all remaining ingredients: the quartered yellow onion, carrot and celery chunks, smashed garlic cloves, crushed black peppercorns, thyme sprigs, bay leaves, and white wine vinegar. The vinegar might seem unusual, but it brightens the stock and helps prevent bitterness. Stir gently to combine, then return to a gentle simmer. The liquid should barely bubble—if it boils vigorously, reduce the heat immediately.
Let the stock simmer uncovered for 2 hours. This long, slow cook time is essential for extracting maximum flavor and collagen from the bones. Check the liquid level occasionally and add hot water as needed to maintain the 1-inch coverage over the bones. After 2 hours, remove the bones with tongs and discard them. The marrow bones should be soft enough to scoop out the marrow with a spoon—transfer this to a small bowl and refrigerate until chilled.
Strain and Finish the Stock
Line a fine-mesh strainer with cheesecloth or a coffee filter to create a makeshift filter bag. Place this over a large bowl and carefully pour the stock through, pressing gently on the solids to extract all the flavorful liquid. Discard the solids in the strainer. The stock should now be clear with just a hint of golden color—this indicates proper straining and flavor extraction.
Return the strained stock to the pot and skim off any remaining fat that has risen to the surface. This step ensures a clean, velvety texture without compromising flavor. Taste the stock and adjust seasoning with the 1 tsp kosher salt if needed—it should be rich and savory, with notes of thyme and garlic. Once seasoned to your liking, let the stock cool slightly, then transfer it to airtight containers. The 1 cup chilled beef bone marrow can now be scooped out and added to the stock for an ultra-rich finish—simply stir it in just before using.
Store and Use Your Stock
The stock will keep in the refrigerator for up to 5 days or can be frozen for 3 months. For best results, use it within 2 weeks for maximum freshness. This stock is incredibly versatile—use it as a base for soups, braises, or risottos, or reduce it to make a glossy pan sauce. The marrow-infused version adds a luxurious depth that takes any dish to the next level. I promise, once you taste the difference, you'll never go back to store-bought stock again.
Pro Tips For Making Beef Bone Marrow Stock
- CHAR THE BONES FIRST: I learned this the hard way—skipping the quick sear on beef bones means a cloudy stock instead of golden, rich flavor. Pat them dry, then hit them hard in a cold pot over medium-high heat for 5-7 minutes until deep brown. That crust is where the depth lives, and it won’t dissolve no matter how long you simmer.
- SCRAPE THE MARROW CLEAN: Bone marrow’s flavor hides in the nubby bits—don’t just scoop the soft center. Use a spoon to dig out every last scrap from the cavities, even the stubborn edges. Toss those shavings into the pot with the bones; they’ll melt into the stock and make it velvety, not just strong.
- COVER THE POT AFTER 30 MINUTES: The first hour is where flavors escape. Once the stock hits a rolling boil and you’ve skimmed the foam, reduce to a gentle simmer, then cover loosely with foil. This traps steam without letting condensation dilute the stock—my grandmother swore by this, and she was right: the color stays richer, and the aroma stays in the kitchen.
- STRAIN TWICE, BUT NOT TOO FINE: After simmering, line a fine-mesh strainer with cheesecloth for the first pass, then strain again through a regular sieve. This catches tiny bone particles that would make the stock gritty, but don’t press the solids—you’ll squeeze out cloudy water. The result? Silky smooth stock that’s still packed with flavor, not filtered to oblivion.
Essential equipment for great beef bone marrow stock
Stockpot Essentials
Start with a 6-8 quart heavy-bottomed stockpot—I swear by All-Clad stainless steel for even heat distribution. The pot should have a wide base to prevent boiling over and a long handle for safety.
Avoid aluminum or thin stainless steel, as they react with acids and can impart off-flavors. For budget-friendly options, Cuisinart MultiClocker or Farberware Classic Stainless Steel work well. 🔥
Precision Tools
A meat thermometer is non-negotiable—use an instant-read model like ThermoWorks Thermapen to monitor bone temperatures. For skimming impurities, a slotted spoon with a fine mesh (like OXO Good Grips) works best.
A fine-mesh strainer with cheesecloth is essential for clarifying the stock—Sieve House makes a great one. Don’t skip the tongs (I use J.B. Prince) for handling hot bones safely.
Marrow Extraction Kit
To access the marrow, grab a sharp chef’s knife (like Wüsthof Classic) and a bone spoon (or a spork). A small bowl for collecting marrow and a spatula for scraping are also helpful.
Pro tip: Ask your butcher to crack open the marrow bones for you—they’ll do it for free and save you time. Store-bought marrow can work, but fresh is always richer. 🧈
Storage Solutions
For short-term storage, glass mason jars (like Ball canning jars) are ideal—they’re airtight and easy to label. For freezing, use quart-sized freezer bags (like Stasher bags) or silicone ice cube trays for single-serving portions.
Label everything with the date—masking tape and a Sharpie work perfectly. A fine-mesh sieve (like OXO Good Grips) helps strain out any remaining solids before storing.
Optional Upgrades
For a clarified stock, invest in a clarifying agent like egg whites or roux—I use KitchenAid stand mixers for whipping egg whites to stiff peaks. A digital scale (like Escali Primo) ensures precise measurements for aromatics.
For long-term storage, vacuum sealers (like FoodSaver) extend shelf life to 6 months. These upgrades aren’t mandatory, but they take your stock to restaurant-quality levels. ✨
Nutrition facts
Frequently asked questions
Why does roasting the bones matter for flavor?
Roasting develops a deep, caramelized crust on the bones that unlocks intense umami flavors during simmering. The Maillard reaction creates hundreds of flavor compounds that dissolve into the stock, giving it that restaurant-quality depth you can't get with raw bones.
Can I use store-bought beef marrow instead of fresh?
Yes, but fresh marrow yields better results. Store-bought marrow often contains preservatives that can mute flavor. If using it, look for 100% pure beef marrow with no additives, and add it to the stock just before serving for maximum richness. For best results, use fresh marrow scooped from your bones.
How do I know when the stock is ready?
The stock should simmer gently for 3 hours total, with the bones becoming soft enough to scoop marrow. When strained, it should be clear with a golden hue and smell intensely savory. Taste it before finishing—it should be rich but not bitter, with well-developed umami.
What's the best way to store leftover stock?
For short-term use, store in airtight glass jars in the fridge for up to 5 days. For long-term storage, freeze in quart-sized bags or ice cube trays (great for single servings). Label with dates—frozen stock maintains quality for 3-6 months. Always cool stock completely before freezing to prevent ice crystals.
Can I make this stock in a slow cooker?
Yes, but with adjustments. Roast the bones first, then transfer to a 6-quart slow cooker with all ingredients. Cook on low for 8-10 hours instead of simmering. The lower heat prevents bitterness but may yield slightly less gelatinous stock. Skim fat regularly during cooking for best results.