Snacks
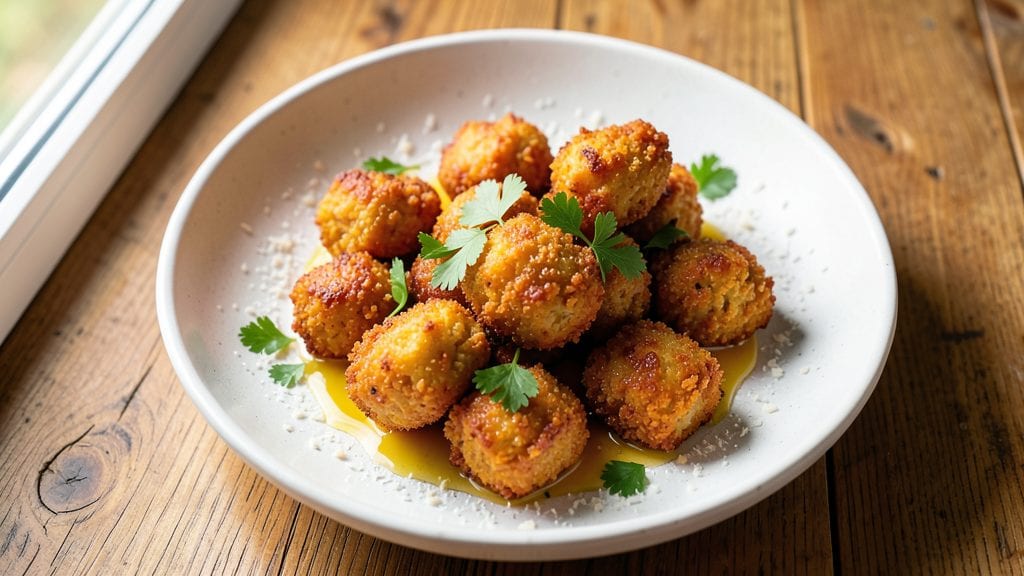
This baked chicken nuggets recipe delivers the same addictive crunch as restaurant favorites—without the grease or fryer. The secret lies in a precise breading technique and high-heat baking that creates that signature crispy exterior while keeping the chicken juicy inside.
I developed this after testing countless variations, and the difference between soggy and perfect nuggets comes down to just a few key steps.
What sets these apart is the two-stage breading process: first a thin layer of flour for adhesion, then a crispy panko-parmesan coating that locks in moisture while creating that satisfying crunch.
Baking at 425°F ensures even browning without drying out the chicken, and a quick broil at the end adds that golden finish. The result? Nuggets that hold their shape, stay crispy even after dipping, and satisfy that craving for comfort food done right.
This method works equally well with boneless chicken breasts or thighs, and the same technique applies to plant-based alternatives like cauliflower or tofu. Serve with classic dipping sauces—honey mustard, BBQ, or ranch—or pair them with a side of roasted vegetables for a balanced meal.
The best part? These nuggets are ready in just 20 minutes, making them perfect for quick weeknight dinners or game-day snacks.
For extra crispiness, I recommend patting the breaded nuggets dry before baking to remove excess moisture. If you're short on time, you can even use frozen chicken tenders as a shortcut—they still achieve that golden crunch.
The key is never overcrowding the baking sheet, which ensures even heat distribution for perfectly crispy results every time.
Ingredients for baked nuggets
Twelve ingredients transform ordinary chicken into addictive, air-crispy nuggets—no fryer needed.
| Ingredient | Amount | Notes |
|---|---|---|
| Boneless Chicken Breasts 🍗 | 1 ½ lb | Cut into 1-inch bite-sized pieces |
| All-Purpose Flour 🌾 | ½ cup | For initial breading adhesion |
| Panko Breadcrumbs 🍞 | 1 ½ cups | Japanese-style for extra crunch |
| Parmesan Cheese 🧀 | ½ cup | Freshly grated, fine texture |
| Large Eggs 🥚 | 2 whole | Beaten for egg wash |
| Garlic Powder 🧄 | 1 tsp | For flavor depth |
| Onion Powder 🧅 | 1 tsp | Adds savory base |
| Paprika 🌶️ | ½ tsp | Smoked for color and flavor |
| Salt 🧂 | 1 tsp | Diamond Crystal kosher preferred |
| Black Pepper 🌶️ | ½ tsp | Freshly ground for heat |
| Olive Oil 🫒 | 1 tbsp | For greasing baking sheet |
| Cornstarch 🌾 | 1 tbsp | Optional for extra crispiness |
The chicken matters most here—boneless breasts give the cleanest texture, but thighs work too if you prefer juicier nuggets. Cut them uniformly (about 1-inch pieces) for even cooking. Trader Joe's sells pre-cut chicken tenders that save prep time, or grab a Costco family pack for bulk savings. Panko is non-negotiable for that signature crunch—Japanese-style stays crispy while regular breadcrumbs turn mushy. For the Parmesan, grate it yourself from a wedge (pre-grated clumps won't melt properly). The cornstarch is optional but worth it if you love that extra-crispy texture—just mix it into the panko before coating.
No panko? Crushed cornflakes or Ritz crackers work in a pinch, though texture won't be identical. Short on Parmesan? Pecorino Romano or nutritional yeast add umami depth. The spices are flexible—swap smoked paprika for regular, or boost flavor with 1/2 tsp cayenne if you love heat. For the egg wash, add 1 tbsp milk or water to make it easier to coat. And if you're using frozen chicken, pat it completely dry before breading to prevent soggy nuggets. The two-stage breading (flour first, then panko mix) is key—don't skip the flour layer or the coating won't stick.
These nuggets stay crispy for 20-30 minutes straight from the oven, so serve them immediately. For make-ahead prep, bake and freeze uncooked breaded nuggets on a parchment-lined tray, then transfer to a bag. Cook straight from frozen (add 3-4 minutes). Reheating works best in a 400°F oven for 5-7 minutes—microwaving kills the crunch. Store cooked nuggets in an airtight container for 3 days, or freeze for up to 3 months. Pro tip: Line your baking sheet with a wire rack over parchment for even crispiness on all sides.
Why You'll Love This Recipe
- The secret’s in the bake: golden panko crust outside, tender chicken inside. That first bite—where the Parmesan adds a salty punch and the breading shatters just enough—is why I keep making these instead of takeout.
- No-Fuss Breading: I swear by the flour-egg-panko-Parmesan combo—it sticks like glue but doesn’t require dredging stations. Just three quick dips (chicken → flour → egg wash → breadcrumbs), and you’re done. My kids call it "the sprinkle step," and honestly, that’s all it takes.
- Crispy-Creamy Magic: The secret’s in the bake: golden panko crust outside, tender chicken inside. That first bite—where the Parmesan adds a salty punch and the breading shatters just enough—is why I keep making these instead of takeout.
- Weeknight & Party Star: Throw them on a sheet pan for a 20-minute dinner or double the batch for game day. My college friends still ask for the recipe, and I’ve served them at BBQs, potlucks, and even as a "fancy" appetizer with marinara. Works everywhere.
Step-by-step instructions for air-crispy chicken nuggets
Here's how to create restaurant-quality nuggets with a golden, shatteringly crisp exterior and juicy interior—no deep-fryer required.
Cut and Prep the Chicken
Begin by cutting the 1.5 lb boneless chicken breasts into 1-inch bite-sized pieces. I like to work quickly here—cutting against the grain ensures tender bites. Place the pieces in a medium bowl and set aside. The smaller the pieces, the more surface area for that perfect crust to form, so don't rush this step.
While the chicken rests, mix the 1 tbsp cornstarch with the 0.5 cup all-purpose flour in a shallow dish. The cornstarch is your secret weapon—it creates an extra-crispy barrier between the chicken and the breading. This step is non-negotiable if you want that air-fryer-like crunch without the appliance.
Create the Breading Station
In a separate shallow dish, beat the 2 whole large eggs until just combined—no need to overmix. In another dish, combine the 1.5 cups panko breadcrumbs, 0.5 cup freshly grated parmesan cheese, 1 tsp garlic powder, 1 tsp onion powder, 0.5 tsp paprika, 1 tsp salt, and 0.5 tsp black pepper. This is your flavor powerhouse—panko gives that signature crispiness while parmesan adds umami depth.
Arrange your stations in this order: flour-cornstarch mix, beaten eggs, then breadcrumb mixture. This sequential dredging ensures each layer adheres perfectly. I always use a wire rack over a baking sheet for this process—it prevents soggy bottoms by allowing air circulation underneath.
Bread the Chicken for Maximum Crunch
Working in batches to avoid overcrowding, dredge each chicken piece first in the flour-cornstarch mix, shaking off any excess. Then dip into the beaten eggs, letting any excess drip off before pressing into the breadcrumb mixture. Press firmly—this ensures the coating sticks and creates that satisfying crunch. You should end up with pieces that look uniformly coated and ready for the oven.
Place the breaded nuggets on a parchment-lined baking sheet, spacing them about 1 inch apart. This gives them room to expand and crisp without steaming. Let them rest for 5 minutes while you preheat your oven to 425°F. This resting period helps the coating adhere even better before baking.
Bake to Golden Perfection
Bake the nuggets for 12-15 minutes, flipping them halfway through at the 8-minute mark. You're looking for deep golden brown color and a crisp exterior that sounds hollow when tapped. The internal temperature should reach 165°F—use an instant-read thermometer to check the thickest piece. If they brown too quickly, tent with foil for the last few minutes to prevent burning.
Here's the pro tip: For even crispier nuggets, broil for 1-2 minutes at the very end. Watch closely—broiling can happen fast, and you want that caramelized finish without charring. Remove from the oven and let them rest for 3 minutes before serving. This resting period keeps them crispy longer and prevents the breading from falling apart when you pick them up.
Serve with Dipping Sauces
Serve immediately with your favorite dipping sauces—honey mustard, marinara, or even a simple yogurt-based ranch. The nuggets will be at their crispiest right out of the oven, so don't let them sit too long. For extra indulgence, sprinkle with additional black pepper or a pinch of paprika right before serving to intensify the flavors.
Real talk: These nuggets are so addictive that they'll disappear faster than you can say "second helping." The secret to their success lies in the layering technique and that high-heat bake—no shortcuts here if you want that authentic crunch. Trust the process, and you'll have nuggets that rival any fast-food joint, minus the grease.
Pro Tips For Making Baked Nuggets
- CHOP SMALLER THAN YOU THINK: I learned this the hard way—oversized nuggets stay undercooked inside while the outside burns. Aim for 1-inch cubes max, or you’ll end up with dry, unevenly cooked chicken. (Yes, even if it means extra chopping.)
- USE COLD CHICKEN: Skip thawing or room-temp chicken—straight from the fridge works best. Cold chicken holds its shape better in the egg wash, and the coating sticks tighter. (Your future self will thank you when the nuggets don’t fall apart.)
- DON’T SKIP THE PARM: Parmesan isn’t just for flavor—it’s the glue that makes the crust crispier and stickier. Grate it fresh (or buy pre-grated, but dry it in a sieve for 5 minutes first). Wet parm = soggy nuggets.
- BAKE IN BATCHES, NOT CROWD: Start hot (425°F) for crispy crusts, but resist the urge to pack the tray. Leave at least ½ inch between nuggets, or they’ll steam instead of brown. (I know, I know—it means two batches, but the difference is night and day.)
Storing and reheating this dish
Refrigerator Storage
Store cooked nuggets in an airtight container for up to 3 days at 40°F or below. The two-stage breading helps maintain crispiness longer than traditional breaded chicken. I like using glass Pyrex containers with snap-on lids—they keep the nuggets from absorbing fridge odors.
To reheat, spread them on a baking sheet and warm at 350°F for 5-7 minutes for that crispy texture. 🌡️
Freezer Prep
For long-term storage, freeze uncooked breaded nuggets on a parchment-lined tray for 1 hour before transferring to a freezer bag. This prevents clumping. Cook straight from frozen by adding 3-4 extra minutes to the baking time.
The cornstarch in the breading helps maintain texture even after freezing. Label bags with the date—these keep well for up to 3 months. ❄️
Reheating Methods
Oven reheating is my top choice: Place nuggets on a wire rack over a baking sheet and heat at 400°F for 5-7 minutes until golden and crispy. For microwave reheating, use 50% power for 1-2 minutes covered with a damp paper towel to retain moisture. Avoid microwaving if you want crispiness—it’s a trade-off. A quick air fryer at 375°F for 3-4 minutes also works beautifully. 🔥
Crispiness Hacks
To revive crispiness after storage, broil for 1-2 minutes at the end of reheating. The high heat caramelizes the breading again. For extra crunch, sprinkle 1 tsp panko on top before reheating.
If nuggets seem dry, brush with 1 tsp melted butter before reheating—it adds moisture without sacrificing texture. The two-stage breading makes all the difference here. ✨
Make-Ahead Tips
Prep uncooked breaded nuggets up to 24 hours ahead and store in the fridge. Bake straight from the fridge—just add 2-3 extra minutes to the cooking time. For freezer-friendly prep, assemble nuggets, freeze on a tray, then transfer to a bag.
Cook from frozen by adding 5-7 minutes to the baking time. This saves time on busy weeknights. 📅
Dipping Sauce Pairings
Serve reheated nuggets with warm dipping sauces to keep them crispy longer. Honey mustard or spicy marinara work best—heat sauces gently before serving. For a cool contrast, pair with ranch or blue cheese dressing.
Avoid sauces with high water content (like salsa) right after reheating—they’ll make the breading soggy. Serve sauces in small bowls to prevent over-dipping. 🍯
Nutrition facts
Frequently asked questions
Can I use frozen chicken tenders instead of fresh chicken?
Frozen chicken tenders work perfectly—just pat them completely dry before breading to prevent soggy nuggets. No need to thaw first; bake straight from frozen by adding 3-4 extra minutes to the 15-minute total time. The two-stage breading still creates that crispy exterior.
Why did my nuggets turn out soggy instead of crispy?
Soggy nuggets usually happen from excess moisture or overcrowding. Always pat breaded nuggets dry before baking and space them 1 inch apart on the sheet. Overcrowding traps steam, while skipping the 5-minute rest before baking prevents proper coating adhesion.
What's the best way to make these vegan?
Swap chicken for firm tofu or cauliflower florets, pressing out excess moisture first. Use a flax egg (1 tbsp ground flax + 3 tbsp water) instead of regular eggs, and add 1 tbsp nutritional yeast to the breading for umami. Bake at 400°F for 18-20 minutes, flipping halfway.
Can I bake these in an air fryer instead?
Yes! Preheat your air fryer to 375°F and cook in batches for 8-10 minutes, shaking halfway. The high heat creates crispiness without deep-frying. For extra crunch, spray with 1 tsp olive oil before air frying.
How do I keep nuggets crispy when serving with sauces?
Serve sauces on the side in small bowls to prevent sogginess. Warm sauces like honey mustard or marinara first—they won't steal moisture like cold sauces. For extra insurance, broil nuggets for 1 minute right before serving to restore crispiness.